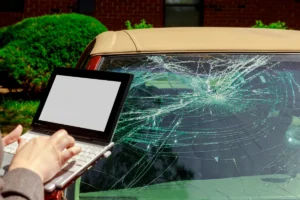
Is your car’s rear window fogging up and making maneuvering your vehicle harder? Your defroster grids are likely acting up. Locating damage and repair in grid lines is not as difficult as it sounds if you know what to look out for. Research shows that the most frequent type of collision is rear-ended collisions.
Here’s everything you need to know about fixing your car’s back window defroster grids to increase the visibility and safety of yourself and your family.
Check For Power
Buy a defroster repair kit and multimeter from any local repairs shop in San Antonio, Texas. It has required supplies for the tab and grid lines. To check if there’s power getting to the defroster grid, turn the car and defogger on. Set your multimeter to DC voltage and connect its leads to the wires going to the defroster grid. If the multimeter shows battery voltage, that means your wires and switch are working, and just the broken tab needs repair. Start by turning off the defogger.
Sand The Tab
By squeezing the connector, release the broken off tab and carefully pull it out. Next, use sandpaper on the tab to flatten the connecting surface and free it from all precious material.
Wipe With Activator
Next, use the green towelette to wipe the area where the tab will be connected. Make sure you don’t reattach the tab to the same place it came off. Let the activator dry for not less than two minutes. Then rub the provided adhesive pouch until it becomes beige and apply a drop of this glue to the tab’s surface. Instantly apply it to the grid, holding it firmly for a minute.
Check For Connection
Keep your multimeter to resistance and touch the leads together to make sure the device is operational. Then touch the tab and grid to make sure they’re connected. If the reading is close to zero, you’ve got a good connection—and you need to join the wire to the tab. Turn the defogger on and check for broken grid lines by setting the multimeter to DC voltage. Touch the leads to the grid’s opposite sides-you should get approximately 12 volts.
Alcohol Prep
To repair the problematic area, turn the defogger switch off, use an alcohol prep pad to clean that space, and apply the stencil over the grid’s damaged area. There must be a firm seal between the stencil and glass, so remove air bubbles below the stencil.
Paint Over The Stencil
Using the provided small brush, apply the repair compound over the stencil, and after the first coat, wait for the surface to become tack free. Repeat the procedure until no light is coming through the repaired area and wait 30 minutes before removing the stencil. Let it sit overnight or for 24 hours before using the defroster. You can either check the repaired area’s resistance by placing the leads on the opposite sides of it or turn on the defogger and check for voltage drop.
Looking for a reliable rear windshield repair service? Our team of experts offers windshield repair and replacement, auto glass repair, and auto glass replacement with mobile windshield restoration at affordable rates! Get a free estimate today.